Insights
Retail Visual Merchandising: The Complete Guide for Boutique Retailers
June 14, 2026
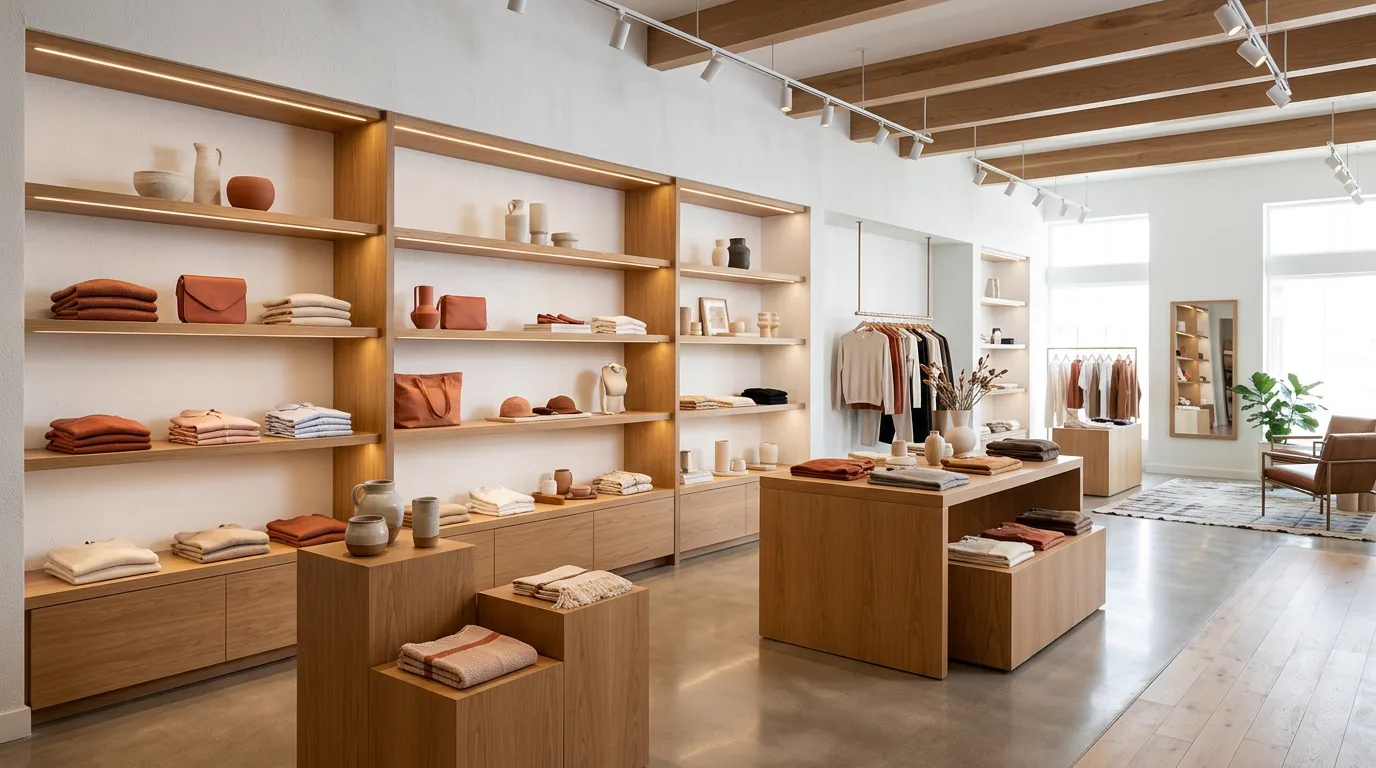
Quick answer: Visual merchandising is the practice of arranging products, fixtures, lighting, and signage to guide customers through a retail space and drive purchases. Done right, it increases average transaction value, reduces time-to-decision, and makes a store feel worth returning to. The 5 core principles are: the rule of three, the sight line hierarchy (eye level is buy level), color blocking and flow, the decompression zone, and lighting as a selling tool.
Most retail stores are full of products that customers walk past without stopping. The merchandise is there. The signage exists. But nothing pulls people in or tells them what to do next. That is a visual merchandising problem, and it costs boutique brands more in lost sales than almost any other operational issue.
Quick Answer: Visual merchandising is the practice of arranging products, fixtures, lighting, and signage to guide customers through a retail space and drive purchases. Done right, it increases average transaction value, reduces time-to-decision, and makes a store feel worth returning to.
What Is Visual Merchandising
Visual merchandising is every intentional design decision that shapes how a customer experiences your store from the moment they see the window to the moment they reach the checkout counter. It covers product placement, fixture height and spacing, lighting direction, color grouping, signage hierarchy, and the flow path customers take through your space.
The goal is not decoration. The goal is conversion. Every product that lands at eye level on a well-lit fixture sells more than the same product buried on a bottom shelf in poor light. That is not a theory. That is what consistent retail data shows across every category from apparel to specialty food to wellness products.
For boutique brands opening a second or third location, visual merchandising is the difference between a store that replicates the first location’s sales performance and one that underperforms despite having the same products and the same price points.
The 5 Core Principles of Retail Visual Merchandising
1. The Rule of Three
Products displayed in groups of three sell better than singles or pairs. The eye finds odd-numbered groupings more naturally compelling. This applies to shelf arrangements, window displays, and tabletop vignettes alike. A single candle looks lonely. Three candles at different heights create a moment worth stopping for.
2. The Sight Line Hierarchy
Eye level is buy level. Products placed between 48 and 60 inches from the floor get purchased at roughly three times the rate of products at floor level. Your best-margin items belong in that zone. Slower-moving inventory or bulky stock goes below. Aspirational or decorative pieces go above, adding visual interest without cluttering the primary selling zone.
3. Color Blocking and Flow
Customers navigate stores by color before they read any signage. When products are organized by color family rather than scattered by category, the store feels organized and easier to shop. Color blocking also creates visual landmarks that help customers remember where they saw something, which drives return visits and referrals.
4. The Decompression Zone
The first 10 to 15 feet inside any retail entrance is what retail designers call the decompression zone. Customers are adjusting from the outside environment. They are not ready to buy yet. Placing high-value or complex products in this zone is one of the most common mistakes boutique brands make when opening a new location. Use this area for brand storytelling, texture, and sensory cues that set the mood.
5. Lighting as a Selling Tool
General overhead lighting illuminates a space. Accent lighting sells products. A track-lit display draws the eye across a room. A product spotlight increases perceived value. The difference between a discount store and a boutique is often just lighting strategy, not product quality.
Visual Merchandising Examples That Work
| Store Type | Merchandising Tactic | Why It Works |
|---|---|---|
| Apparel boutique | Outfit vignettes on mannequins at entrance | Reduces decision fatigue, increases units per transaction |
| Specialty food | Tasting station near highest-margin items | Sensory engagement drives impulse purchases |
| Wellness retail | Scent zones, texture-rich displays at mid-store | Slows customer pace, increases dwell time |
| Home goods | Lifestyle vignettes showing products in use | Customers buy the scene, not just the item |
| Footwear | Perimeter wall with heel-to-toe color spectrum | Creates exploration, surfaces product depth |
The best visual merchandising examples share one trait: they reduce the mental effort required to buy. When a customer can see exactly how something fits into their life, or how it pairs with what they already own, the purchase decision becomes easier.
Applying Visual Merchandising in Your Retail Store
The floor plan is the foundation. Before you can merchandise well, the space has to support it. The location of your fixtures, the width of your aisles, the position of your checkout counter, and the placement of your lighting rough-in all have to be designed with customer flow in mind.
This is where retail space planning and visual merchandising become inseparable. A floor plan that routes customers through the back of the store before they reach checkout creates more opportunities for discovery. A floor plan that funnels everyone straight to the register limits dwell time and transaction size.
For boutique retailers scaling to a second location, the most common error is copying the first store’s layout without adapting it to the new space. Square footage is not the same as usable selling floor. Traffic patterns differ by neighborhood and storefront orientation. A good retail design company will model customer flow before a single fixture is ordered.
What we consistently see in second-location builds: the first store was laid out by the owner based on what felt right. By the second store, data from the first location shows which zones drove transactions and which were dead zones. Designing the second store around that data changes everything.
Practical Steps for Your Next Location
- Map the top three product categories by margin and give each a dedicated zone with deliberate sight lines from the entrance
- Plan lighting rough-in before finalizing fixture placement, not after
- Keep the decompression zone open, brand-forward, and sensory-rich
- Test your checkout counter placement for both operational efficiency and cross-sell opportunity
- Design for the category you want to be known for, not for every category you carry
How Prestige 360 Design Helps
We build commercial retail spaces in Texas with visual merchandising baked into the design from day one. Our work with boutique retailers, wellness brands, and specialty operators starts with the floor plan and ends with a store that is ready to sell on opening day, not one that needs a visual merchandising consultant to fix it six months later.
Our team handles everything under one contract: architectural drawings, city permitting, construction, fixture installation, and lighting. When a client hands us a lease on a new commercial space, we deliver a fully built store designed to convert. We cover commercial interior design across Texas, including San Antonio, Austin, Houston, New Braunfels, and the Hill Country.
If you are planning a second retail location and want a space that performs from day one, reach out for a consultation. We will walk you through how the floor plan supports your merchandising strategy before we draw a single line.
Key Takeaways
- Visual merchandising is about conversion, not decoration. Every decision should drive a purchase or a return visit.
- Eye level is buy level. Your highest-margin products belong in the 48-60 inch zone.
- The floor plan determines what visual merchandising is even possible. Plan the space before ordering fixtures.
- Lighting direction and intensity changes perceived product value more than almost any other design element.
- Second-location builds that use sales data from the first store outperform those that copy the first layout.
Frequently Asked Questions
What is visual merchandising in a retail store?
Visual merchandising in a retail store is the intentional arrangement of products, fixtures, lighting, and signage to guide customer behavior and increase sales. It includes everything from window displays and product placement to floor layout and lighting design. The goal is to reduce friction in the buying decision and increase how much customers spend per visit.
What are visual merchandising examples?
Common visual merchandising examples include outfit vignettes on mannequins near the store entrance, color-blocked product walls, tasting stations near high-margin food items, lifestyle displays that show products in use, and spotlight lighting on featured merchandise. The most effective examples reduce the customer’s need to imagine how a product fits into their life by showing it directly.
How does visual merchandising affect sales?
Visual merchandising directly affects where customers go in a store, how long they stay, and what they buy. Research across retail categories consistently shows that eye-level placement increases sales by 50 to 80 percent compared to the same product at floor level. Accent lighting increases perceived product value and purchase intent. Structured customer flow paths increase average transaction size by driving exposure to more product categories.
Do I need a designer to set up visual merchandising?
For a first store, many owners handle basic visual merchandising themselves. For a second or third location, working with a commercial interior designer who builds the merchandising logic into the floor plan and fixture layout from the start produces better results than retrofitting a generic space. The lighting rough-in, fixture placement, and customer flow path all need to be coordinated before construction begins.